
You probably already know that you need to make your images ADA compliant, so they are accessible to those with vision disabilities (can be blindness or partial blindness). Since they can’t see your images, you should provide them an alternative way to know what your photo is all about.
To make your photos and images ADA compliant, you should add alternative text, also known as “ALT text” so that those with vision disabilities can have a description of that image read out-loud to them. For images on a website, include a descriptive “alt” attribute within the image (img) tag, or there may be a built-in method to add the ALT text depending on your platform. For documents including PDFs and slideshows, you can also add ALT text so that blind readers can hear a description of each image. You can also add descriptive text directly to an image through its metadata, or EXIF data, although this has limited support.
When you further describe the images on your website and in documents using alt text, not only are you providing an accessible way for everyone to experience your images, you’re also making them available for a wider audience. And if the images are available on a website, including within documents, they are in public space so it’s the law to make them ADA compliant. Providing alt tags is only one of many guidelines that should be followed to eliminate the risk of ADA compliance lawsuits.
For websites, adding alt text also helps with search engine optimization.
So let’s go into greater detail below on how to add alt text to your images and what you should say in that alternative text.
How do you add ALT text to your images?
One common misconception is that alt text is just for websites. It’s actually used in any document that includes images such as PDFs, Word documents, presentations, even Google Docs.
Adding ALT text is largely dependent on the format that you’re displaying your images, whether on a website or within the content of a document. I’ve put together some quick instructions here to cover most of the formats you’re likely to encounter. Let’s dive in!
Adding ALT text on your website
Depending on how your website is built, the process for adding ALT text may be different but the end result is that you’re adding a description to each image for screen readers to out-loud. So let’s go over some of the common website platforms to show how to add this.
Adding ALT text in WordPress
If your website was built with the WordPress platform, you can manage all images within the Media Library. Or, you can edit the ALT text separately on each page, post, or widget that you include images. The easiest approach to adding ALT tags in WordPress is to add them immediately when you add new images to the website. However, there are plugins to help bulk update ALT tags for existing images too.
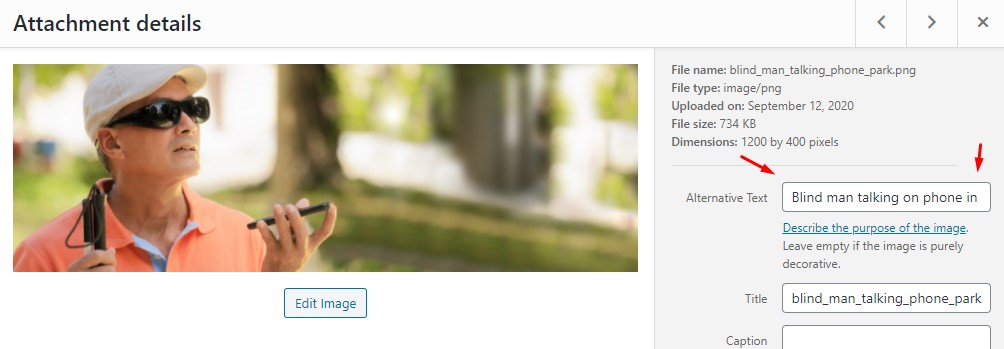
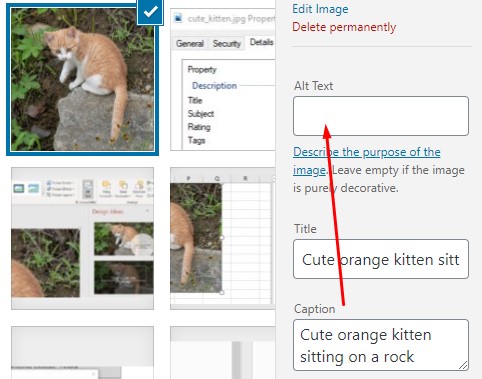
After you upload an image to the Media Library, click on that image to edit its properties. Enter a short description of that image in the “Alternative Text” input like shown below. If you purchased a stock image, they often include a description within the metadata of the image that would display in the Caption field. You can usually copy that text to use as your ALT text.
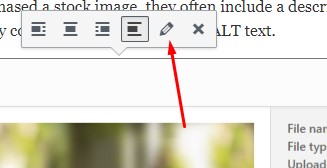
To edit the ALT text for an image within a page or post, click on that image and then click on the edit icon. This will open an “Image details” dialogue where you add or update the Alternative Text. Make sure to click on the Update button to save your changes.
Adding ALT text in Squarespace
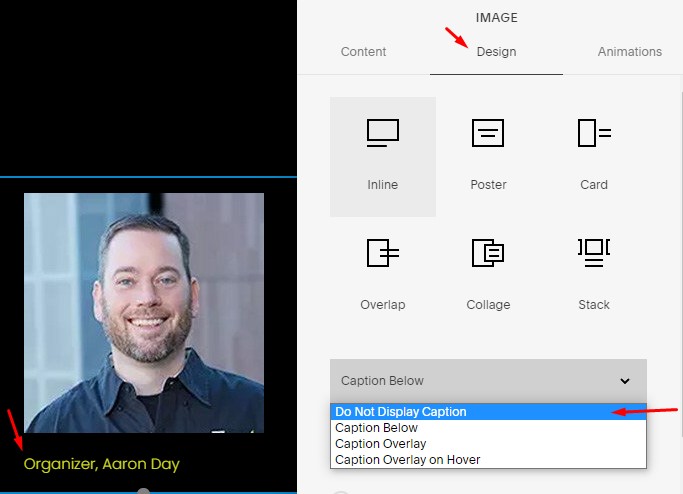
Adding ALT text within Squarespace isn’t straightforward. Navigate to the page and image that you want to edit. Add a caption to your image – this caption will be used as the alt text. After you add it, you can then set the caption to not show so that it’s just used as ALT text. Click on design tab within the Image popup and then select “Do Not Display Caption”. Make sure to apply your changes.
Adding ALT text in HTML
 With any website builder or content management system (CMS) like WordPress, the end result is that you’re adding a description to the “alt” attribute of the image tag like so: <img src=”cute-kitten.jpg” alt=”Cute orange kitten on rock” />
So if you’re writing straight HTML, you can add the alternative text directly in the code. For more in-depth images, you may want to also use the longdesc HTML attribute for the <img> tag that allows you to link to another page that includes a more in-depth description of the image.
It’s also worth mentioning here that there’s no way to directly add ALT text to a background image. However, there are standard workarounds that still gives screen readers a description to read to read so you’re not leaving your vision impaired visitors without a way to experience the image. You can read about these in CanAdapt’s article on Alternative text for background images.
Adding ALT text in a PDF
To edit a PDF, you’ll first need a PDF editor. The best editor comes from the company that created the PDF format: Adobe Acrobat Pro DC but it costs about $15 a month. Their Acrobat Standard would work fine too and is a little cheaper. There are plenty of free PDF editors out there though. You can find them listed here in this article: The best free PDF editors 2020. Note: I haven’t tried any of these so can comment on how well they work.
Adobe Acrobat Pro is the standard though so I’ll cover that here. Unfortunately it’s a lot more complicated than it should be.
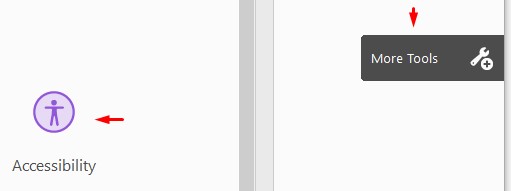
- After you add the image, click on More Tools and then click on Accessibility.

- Next, click on “Set Alternate Text” and click on OK for the prompt that pops up. Enter the alt text for that image, then save and close. Note: I have noticed that sometimes Acrobat won’t recognize an image. If this happens, click on the “Autotag Document” option from the Accessibility menu.

- Save the PDF.

Adding ALT text in Microsoft Word
Microsoft has done a great job with making it easy to add alternative text to images in their Word program. When you first insert an image, they show the ALT text and even automatically generate it for you. As you can see below, they were pretty spot on. Even if they didn’t get it exactly right, it’s easy enough to change the ALT text right there to a better description.
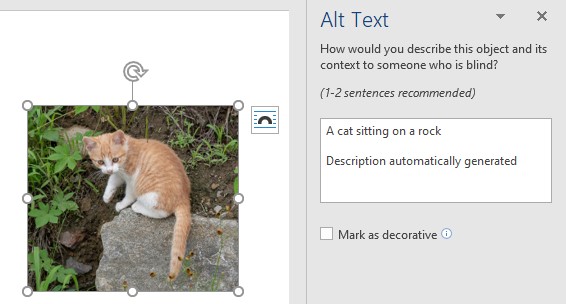
For existing images, you simply need to right-click (in Windows) and select Edit Alt Text from the context menu.
Adding ALT text in Microsoft PowerPoint
When working within the Microsoft PowerPoint application, adding alt text is quick and simple. After you insert the image, the toolbar will switch over to the Picture Format toolbar which includes an option to update the Alt Text. With the slide or image selected, click on “Alt Text”. As you can see below, Microsoft again generates the alt text automatically and you can change as needed.
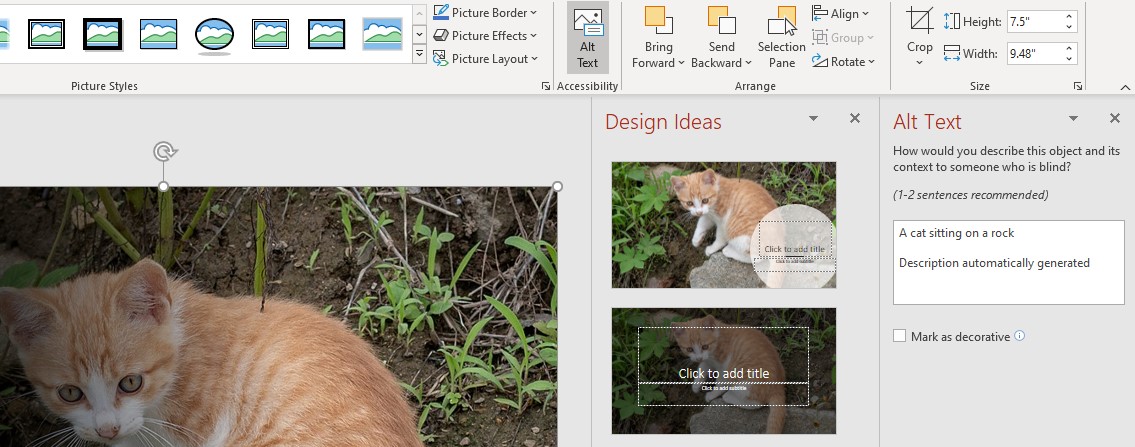
For existing images, you simply need to right-click (in Windows) and select Edit Alt Text from the context menu, or open the Picture Format toolbar and select Alt Text.
Adding ALT text in Microsoft Excel
Within Microsoft’s Excel program, they make it easy to add and update alt text as well. After adding an image, it’ll automatically switch you to the Picture Format toolbar which has an “Alt Text” option in it. Simply add your Alt Text and you’re good to go. If you’re editing an image, you’ll need to switch to the “Picture Format” toolbar first.

Adding ALT text in Google Docs
Google Docs is a free online way to edit documents and they make it easy to add alt text as well. To do so, click on the image and the right click. Select the option for “Alt text” from the context menu. Enter a description in the Alt Text window and you’re good to go!

Note: I’m not sure why there’s a title and description field here but I’ve noticed that if you export the document in Word format, the description is set as the alt text. You may want to put the same alternative description in both fields though – wouldn’t hurt!
Adding ALT text directly to images through metadata
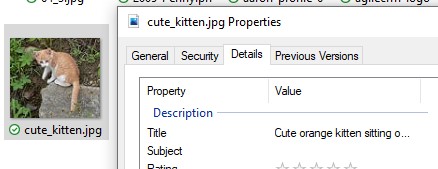
You can’t actually add alt text to images through the metadata or EXIF data but you can add a subject that has limited support in some programs. For example, I’ve added a title to the cute kitten image in Windows below:
When I add this image into WordPress, it’ll pull in that Title as the caption for the imported image. This doesn’t give us alt text but it at least gives a description of the image that can be pasted into the alt text field.
I’m not sure though which other programs use this info.
To add within Windows though, simply right-click on the image and select Properties. You can update the Title under the Details tab. You can update this image metadata (EXIF data) on Mac programs and there are free programs that you can buy or online services as well. It’s not a bad idea to set this information as other platforms and applications may support it in the future.
What should ALT text say?

Now that you know how to add alt text, what should it actually say? The easy rule of thumb is to simply describe it like you would to someone who couldn’t see the image. You don’t need to write an essay, just enough so that a person hearing your description would have at a pretty good idea what the image was all about.
Take for example, this painting by Coolidge. A bad alt text would just say “dogs”.
A good alt text for this would be “a painting of four dogs playing poker”.
A better alt text would be “1894 Coolidge painting of four dogs playing poker around a table”.
You could certainly go into a greater level of detail but for that, if this is for a website, you’d want to use the longdesc attribute instead since alt text is generally used for a more concise description.
How do I optimize alt text?
Since search engines don’t have the ability to view images, they also rely on the provided alt tags to know what the image is about so keep that in mind when you write alt tags. This gives you an extra opportunity for you to include keywords that the search engines will see that can help bring more traffic to your website.
For example, my website is about accessibility and website ADA compliance, so as I’m describing my images for those with sight disabilities, I should also include key terms that would tell Google and other search engines that the images, page, and website are about this topic. That also provides context to the images and how they are being used.
Looking at this page, one may think it’s about cute little orange kittens since I’ve included that image so many times. However, by including the terms “alt text” and “accessibility” within the alt text, it lets those listening with screen readers and Google know that extra context. That in turn, will give your images and pages more SEO value.
WARNING: Keep in mind though that you should use this sparingly. If you overload your alt text with keywords you are doing a huge disservice to anyone using a screen reader and search engines may penalize you for your flagrant misuse. Keep in mind that whatever you write in alt text will be read by screen readers. How much would you want to listen to?
In summary
I’ve shown you how to add alt text to images based on how you’re using them and also why you should do it. The trick now is to remember to do so. It’s much easier to add alt text as you add images and make it part of your process instead of coming in later. Adding alt text will make your images accessible and for websites, more visible for search engines as well!